
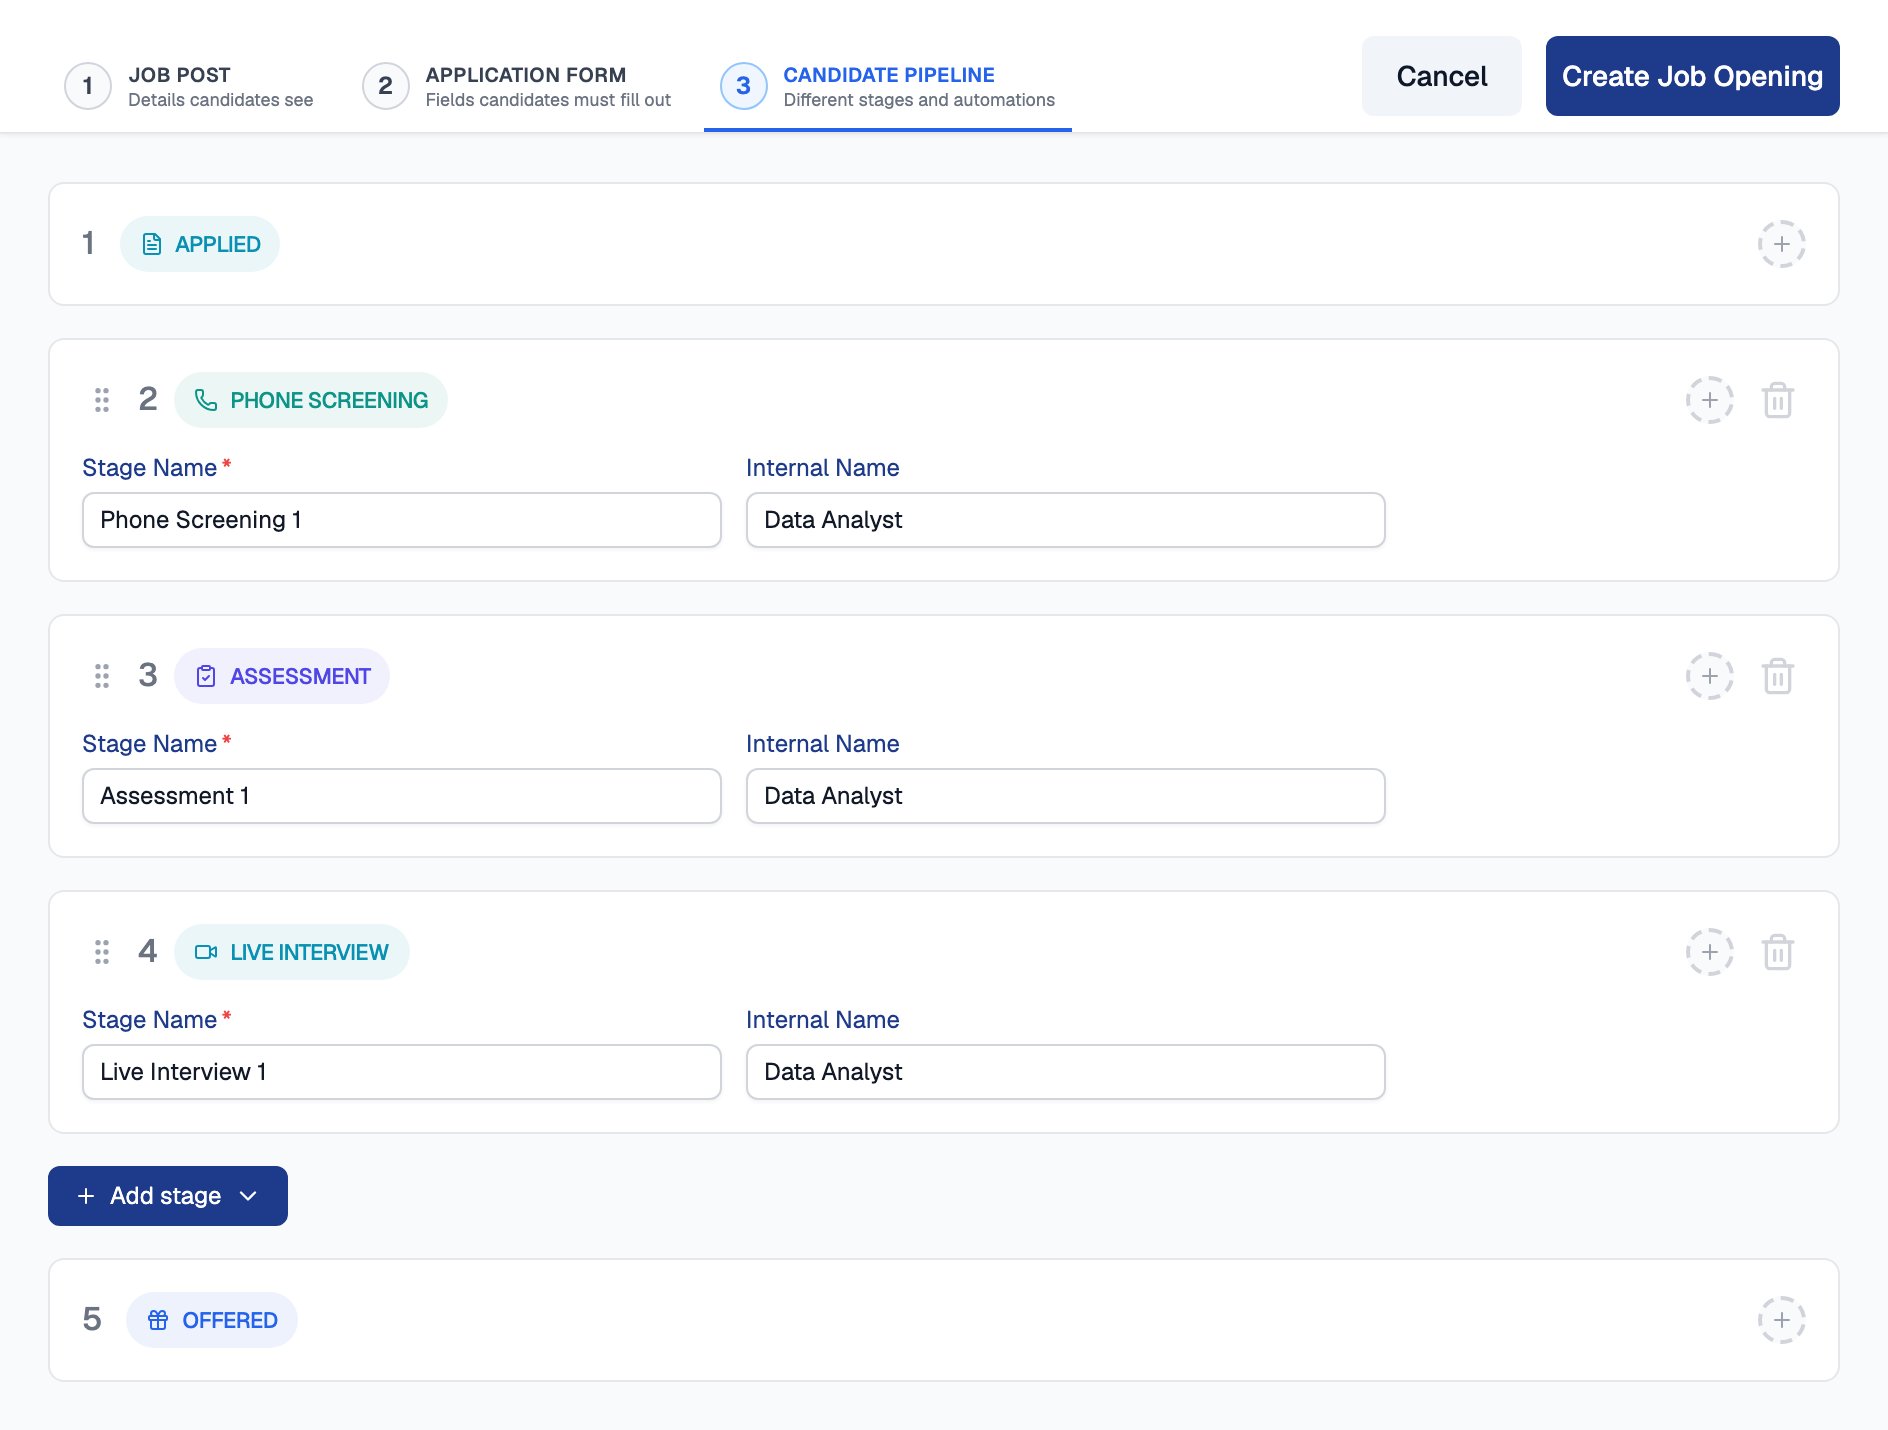
The pipeline builder, with three stages added between Applied and Offered
Choosing Stages
Every pipeline starts with the Applied stage, where every new application lands. From there, add the stages that match your hiring process: Phone Screening, Assessment, One-Way AI Interview, Conversational AI Interview, Live Interview, or Custom. Pipeline Stages explains what each one is for.When you add an Assessment, One-Way AI Interview, or Conversational AI Interview stage, Equip automatically creates the underlying assessment or interview for that stage. You can review and adjust it before inviting candidates.
Reordering and Naming
Drag any stage card to reorder the pipeline. Each stage carries two names:Attaching Templates and Assignees
Each stage can carry its own automations: email templates, a scorecard, and an assignee. What you can attach depends on the stage type:
These automations are visible only after the job opening is saved; you will not find them while still creating it.
To configure a stage:
1
Open the stage
Click the stage card in the pipeline builder.
2
Attach templates and a scorecard
Pick an invitation email template and a rejection email template. Defaults are provided, and you can manage your own under Templates. On stages that support one, select a scorecard.
3
Set an assignee
Click the circular icon on the top right of the stage card and pick a team member. Assignees power the “Mine” filter on the applications dashboard.
Attaching an email template does not mean emails go out automatically. When you move a candidate to a stage, you choose whether to send the email. To have Equip move candidates or send emails for you, set up Stage Automation.
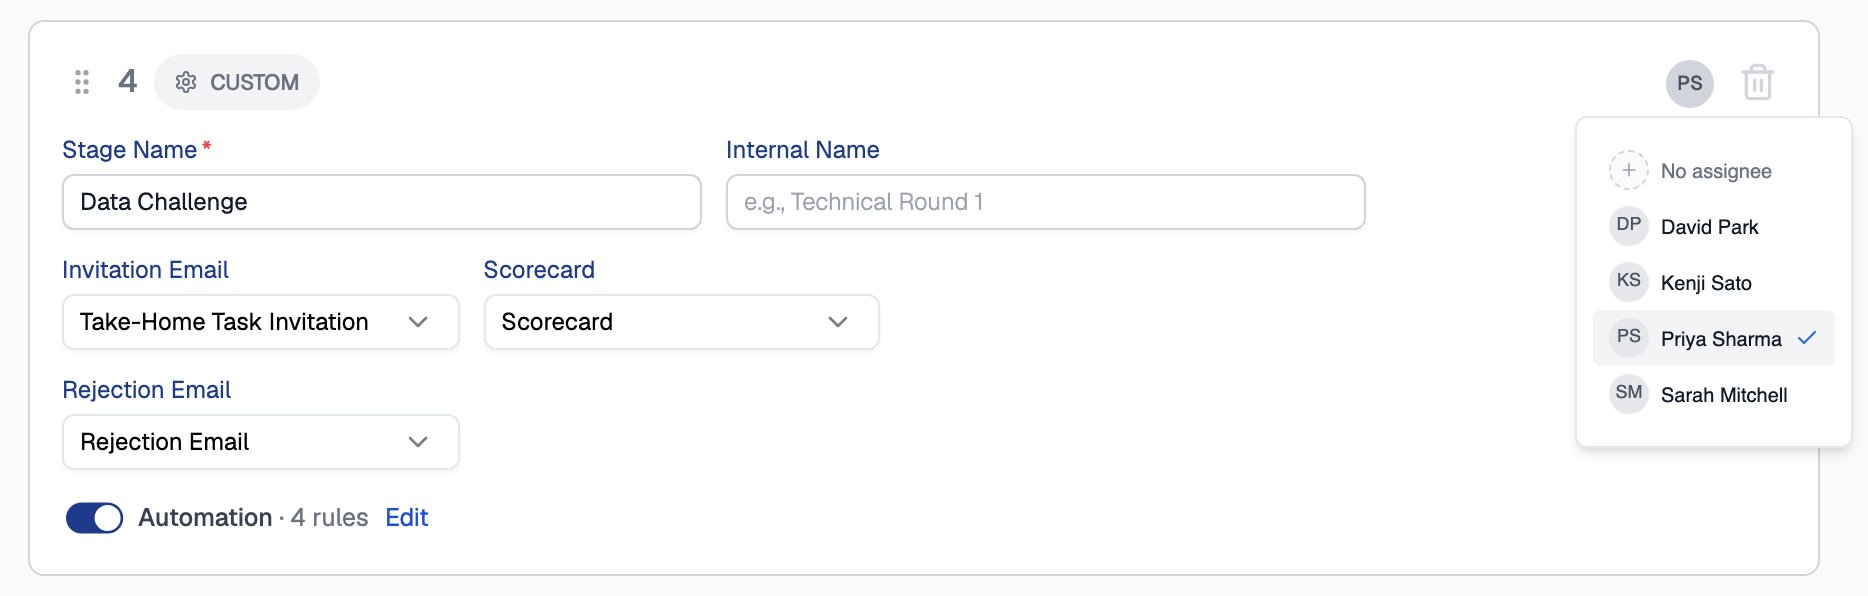
A saved stage with its email templates, scorecard and automation rules, and the assignee menu open
Related Resources
- Pipeline Stages - A deeper look at each stage type and when to use it
- Changing Stages - How to move candidates through the pipeline you built
- Email Templates - Create and customize the templates you attach to stages
- Scorecards - Build scorecard templates for structured interviewer feedback