
Available Settings
Each test has 12 proctoring toggles.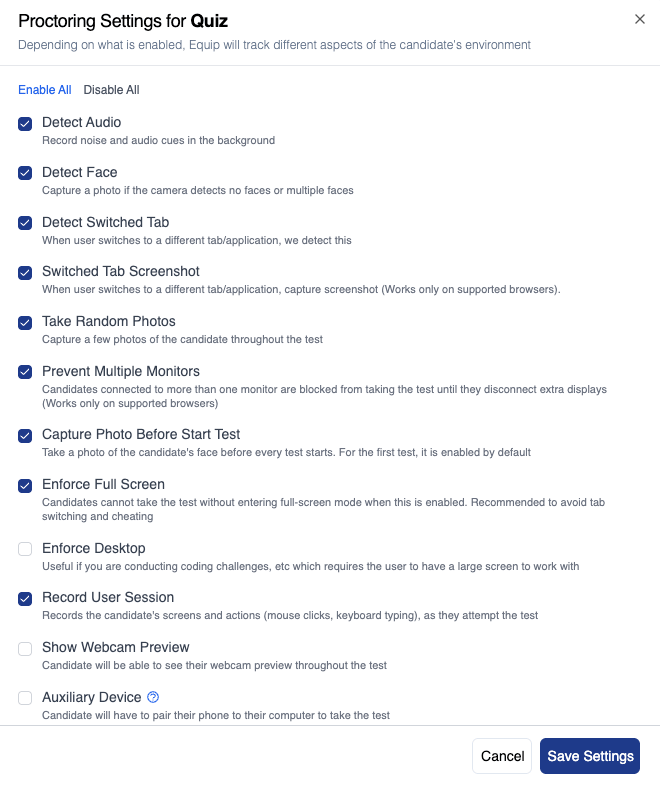
The Proctoring Settings panel with its toggles
Defaults by Test Type
New tests start with most settings on. The exceptions depend on the test type. Auxiliary Device is off by default for every test type.A few toggles are locked, not just defaulted. Camera-related options stay locked off for custom video response tests. Psychometric tests keep tab-switch detection locked off. AI interviews have their own locks, listed under For AI Interviews.
Changing Settings
For Assessments
1
Open the assessment's Settings
Open it from your assessment dashboard.
2
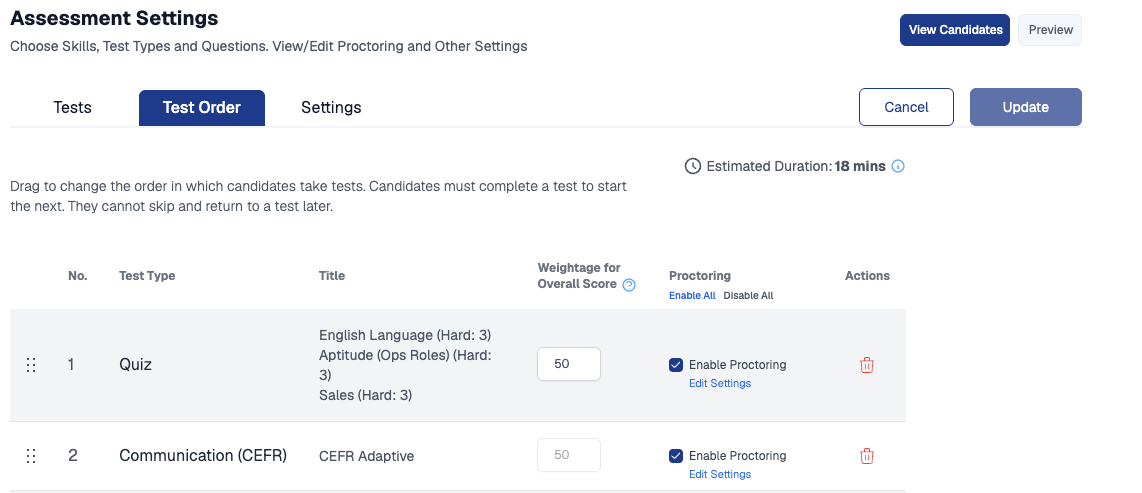
Go to the Test Order tab
Find the test you want to modify and click Edit Settings.
3
Toggle the settings you need
Click Save Settings, then Update. Changes apply to future attempts of that test.
For AI Interviews
1
Open the interview's Settings page
From the AI Interviews dashboard, click Settings on the interview. See Interview Settings for the rest of that page.
2
Expand Proctoring Settings and toggle what you need
On one-way interviews it sits below Main Settings and Timer Settings. On conversational interviews it is under section 5, Proctoring. The locks below still apply.
In the guided setup flow you pick a proctoring level instead: None, Basic (tab and app switches), Standard (tab switch, camera, mic, full screen) or Enhanced (Standard plus auxiliary device).
Related Resources
- AI Proctoring - How Equip’s automated proctoring works end to end
- Anti-Cheating Settings - Question randomization, copy-paste blocking, and auto-submit on tab switch
- Disabling Camera and Mic Tracking - Which tests allow turning camera and mic monitoring off
- Session Recording - Reviewing the screen recording of a candidate’s attempt