
Create a Document
1
Open the Documents tab
Go to Account → Templates, open the Documents card, and click Create document on the Documents tab.
2
Name it and pick a type
Choose Personalized or Fixed.
3
Add the content and check the preview
Write the letter, or upload your PDF. Click Refresh preview to see the finished PDF.
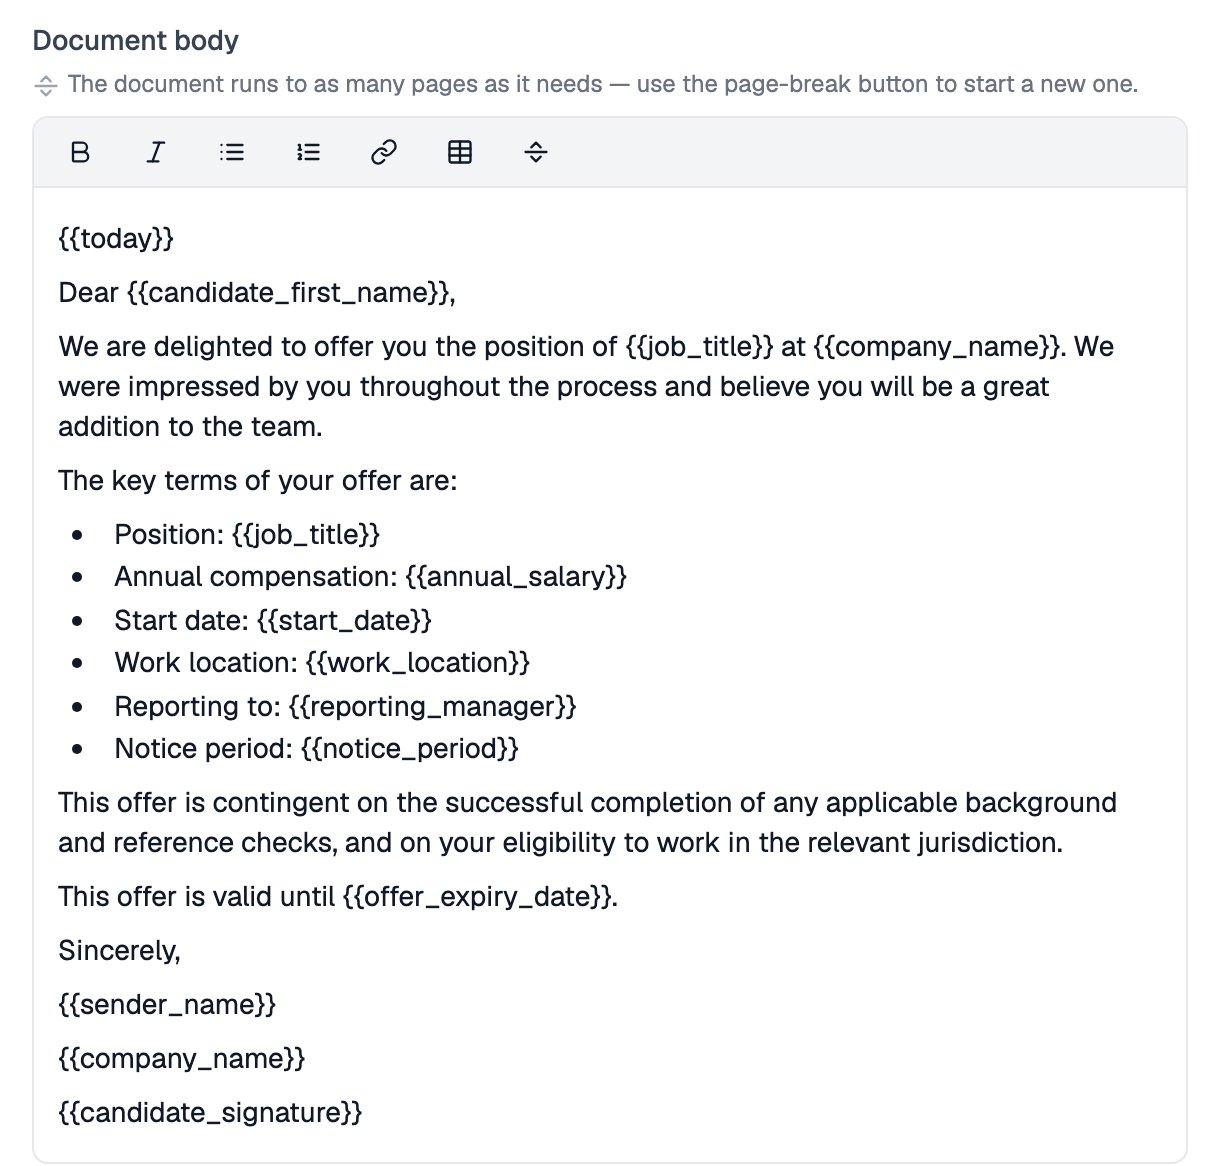
The Offer Letter's body, with the placeholders Equip fills in for each candidate
The letterhead uses your team’s logo and name by default. You can override both for a document that goes out under another brand.
A document is either signed or read-only, and you never set this with a switch. A personalized document is signed when its body contains
{{candidate_signature}}; a fixed PDF is signed when it has at least one candidate field.Variables and Placeholders
Variables are placeholders that Equip replaces with real values when the offer is sent. Equip fills these in for you:
For anything else, type your own variable straight into the letter, for example
{{salary}} or {{start_date}}. Any name made of letters, digits, and underscores becomes a field you fill in when you send an offer.
Three placeholders control signing inside a personalized document:
Build a Packet
1
Create the packet
On the Packets tab, click Create packet.
2
Edit the email and add documents
Equip adds a Review & sign button to the end of the email automatically, so you do not need to add a link yourself. Pick documents from Add a document and drag them into order.
3
Set the validity period and label your variables
Set the days under How long an offer stands. The default is 30. Under Per-candidate variables, adjust the label recruiters see for each variable when they send an offer.
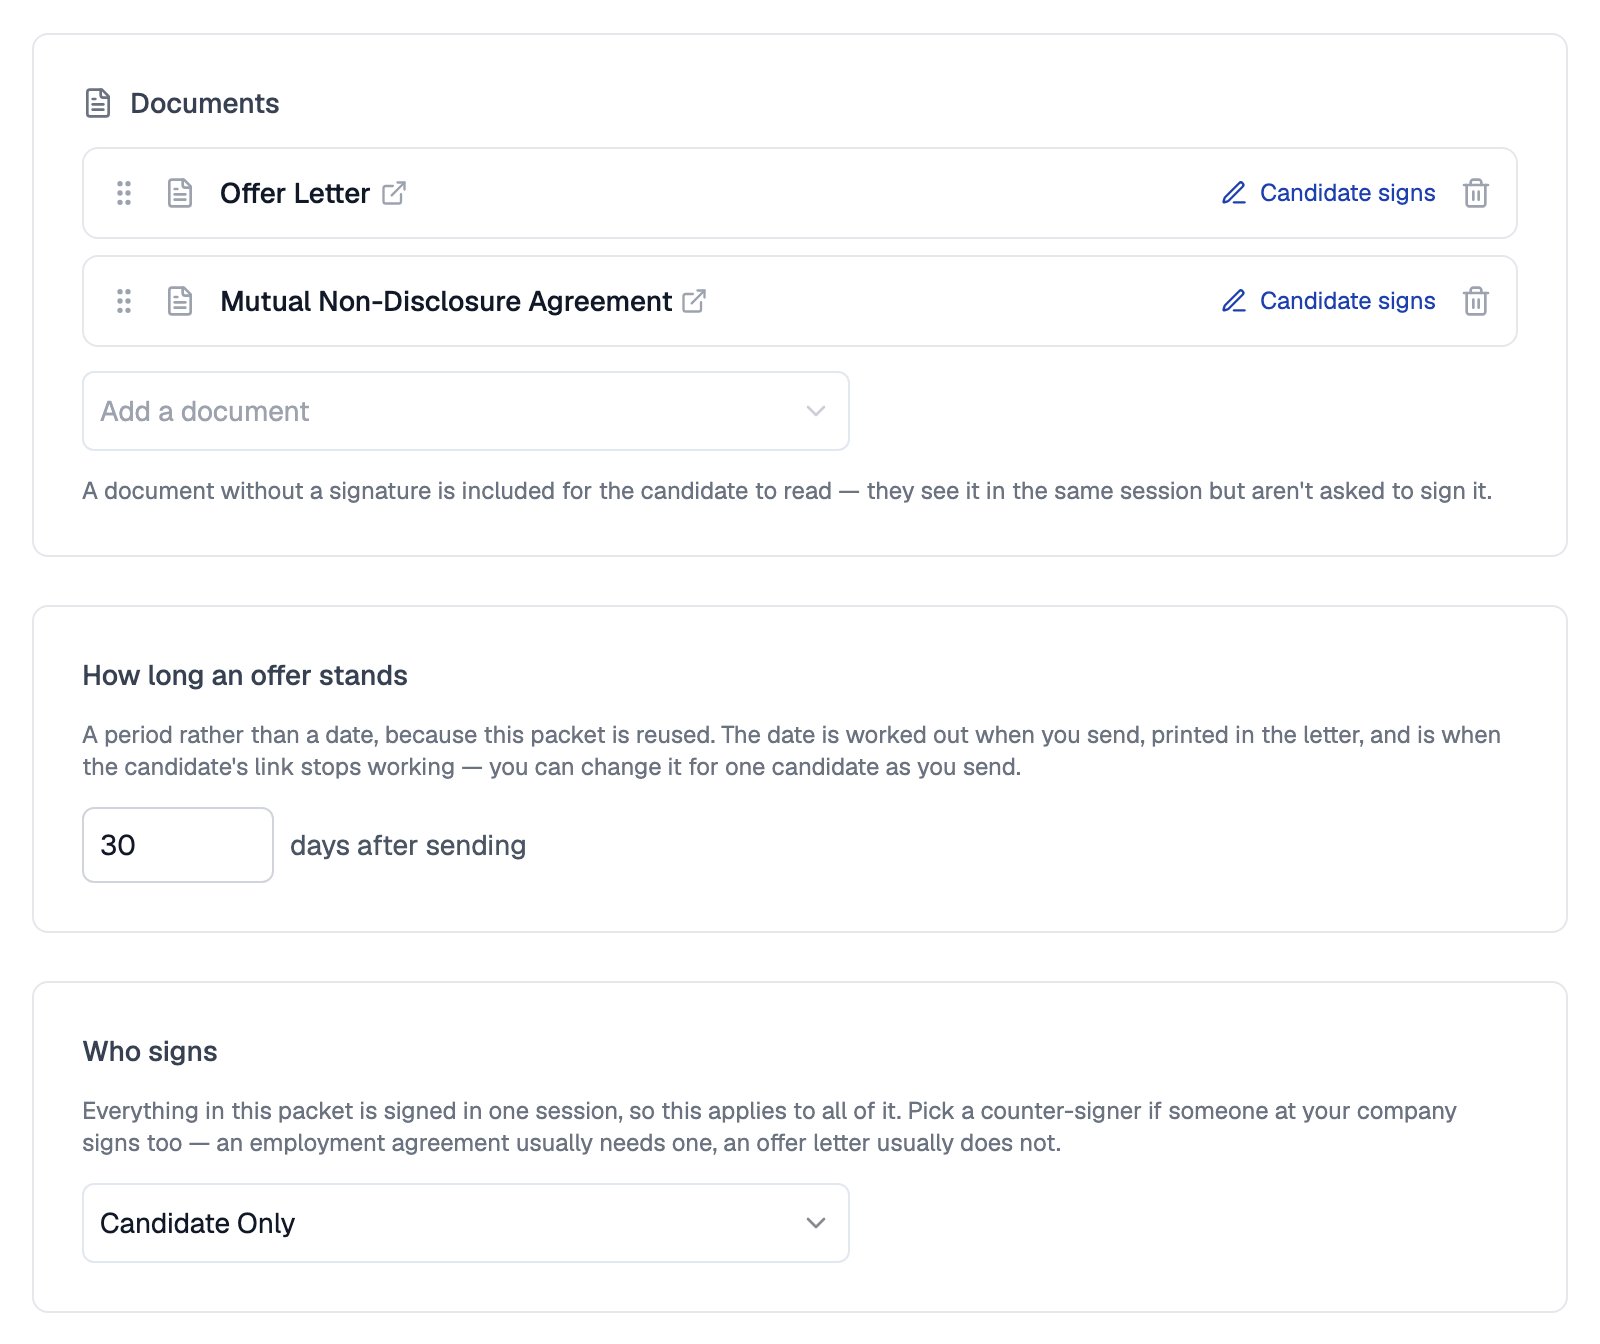
A packet lists the documents to sign, how long the offer stands, and who signs
Attach a Packet to the Offered Stage
Each job opening chooses its own packet. Open the job’s Settings, go to the Candidate Pipeline tab, and pick a packet from the Offer dropdown on the Offered stage card.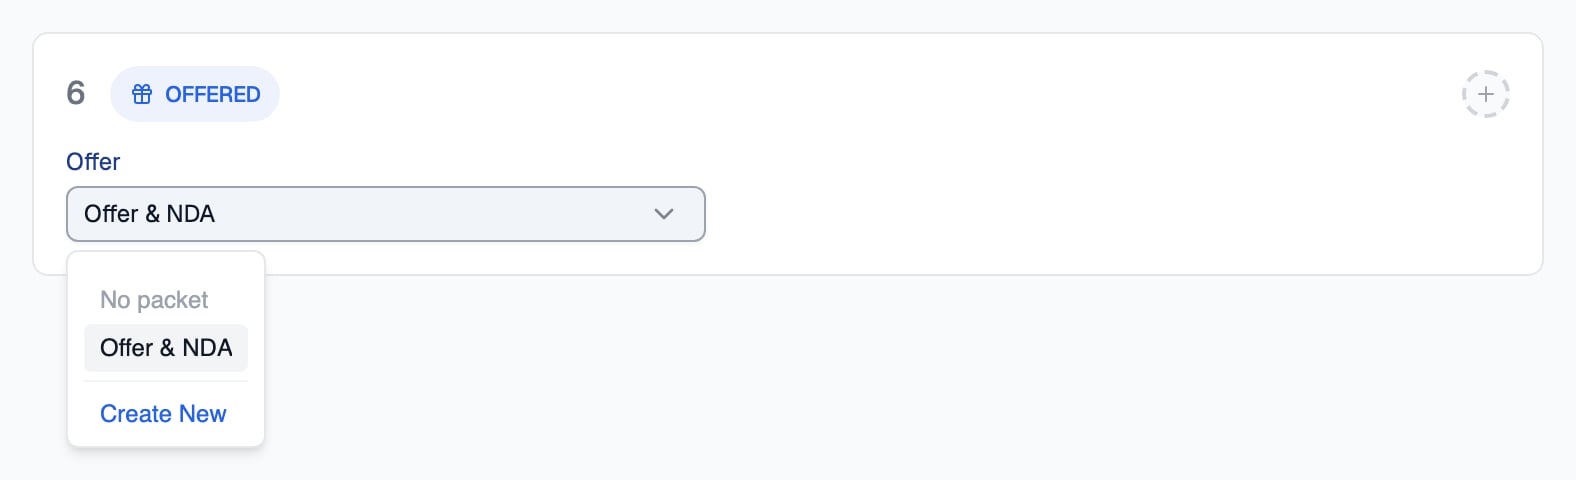
The Offer dropdown on the Offered stage lists the team's packets
Related Resources
- Sending and Tracking Offers - Send a packet to a candidate and follow it through to signature
- Signing Your Offer - What the candidate sees when they review and sign
- Pipeline Stages - Where the Offered stage sits in your pipeline
- Email Templates - The other reusable templates your pipeline sends