
Inviting Members
Any team member can invite new teammates from the Team page.1
Open the Team page
Go to Account > Team in the left sidebar.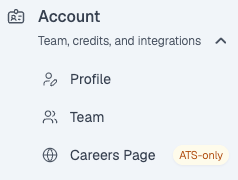
2
Click Invite members

3
Enter email addresses one by one
Press Enter after each email ID. Each invitee receives an email with a link to join your team.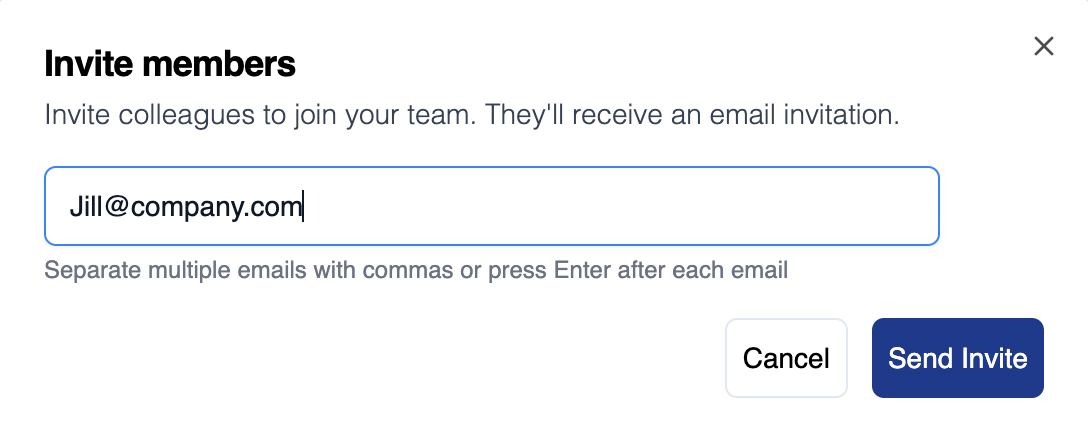
Invitations are restricted to your team’s email domain, and Equip allows one team per domain. Check Seats Remaining on the Billing page before inviting, or upgrade your plan for more room.
Pending Invites
Invitations that have not been accepted yet appear under Pending Invites on the Team page. Click Remove invite to cancel one.Joining via Email
Colleagues with your team’s email domain don’t always need an invite. They can sign in on the login page with their work email, and Equip adds them straight to your existing team.To turn this off, go to Account > Team, open the Organization tab, and set Allow Auto-join to No. Colleagues will then need an invite from the Team Admin.
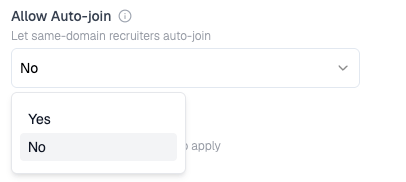
The Allow Auto-join setting
Removing Members
Only the Team Admin can remove a member.1
Open the actions menu
On the Team page, click the three dots next to the member’s name and choose Remove.
2
Confirm
Confirm in the Remove Team Member dialog.
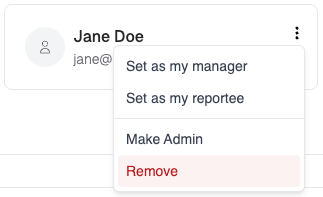
The member actions menu
The Team Admin Role
Every team has exactly one Team Admin. The person who creates the team becomes the admin by default. All members see the same data and can do the same day-to-day work. The admin role only adds a few responsibilities:Changing the Team Admin
Only the current admin can hand over the role.1
Open the Team page
Go to Account > Team in the sidebar.
2
Pick the new admin
Click the three dots next to the member who should become the admin and select Make Admin. You become a regular member.
The Team page also supports an optional reporting structure. A member can be assigned a manager, which Equip’s analytics use to group activity.
Related Resources
- Organization Settings - Update your brand name, legal entity name, timezone, and logo on the same Team page
- How Credits Work - Understand the shared credit balance your whole team draws from
- Invoices - Where invoices go after purchase and how any member can download them
- Security and Privacy - Passwordless login and how Equip protects your account